Publishing your files from Cloud9 to Github
Every time you wish to publish files Github you’ll need to enter the following commands into the Cloud9 Workspace Terminal
Only publish files to Github when you are ready for me to review. In this example, I will create a new file in our workspace and then publish to GitHub.
- In your cloned directory in Cloud9 create a new file (right-click the repository folder and select “New File”
- Name the file index.html
- Open the file in the editor
- Paste the following code into the editor (Update with your details):
- Save the file
To publish to GitHub
- In the Terminal type the folowing command:
cd YOUR_CLONED_REPO_NAME(Replace YOUR_CLONED_REPO_NAME with the name of the repo folder. This is case sensitive.)
- Your terminal should read:
vocstartsoft:~/environment/ifsc-1310 (master)
- Next type:
git status
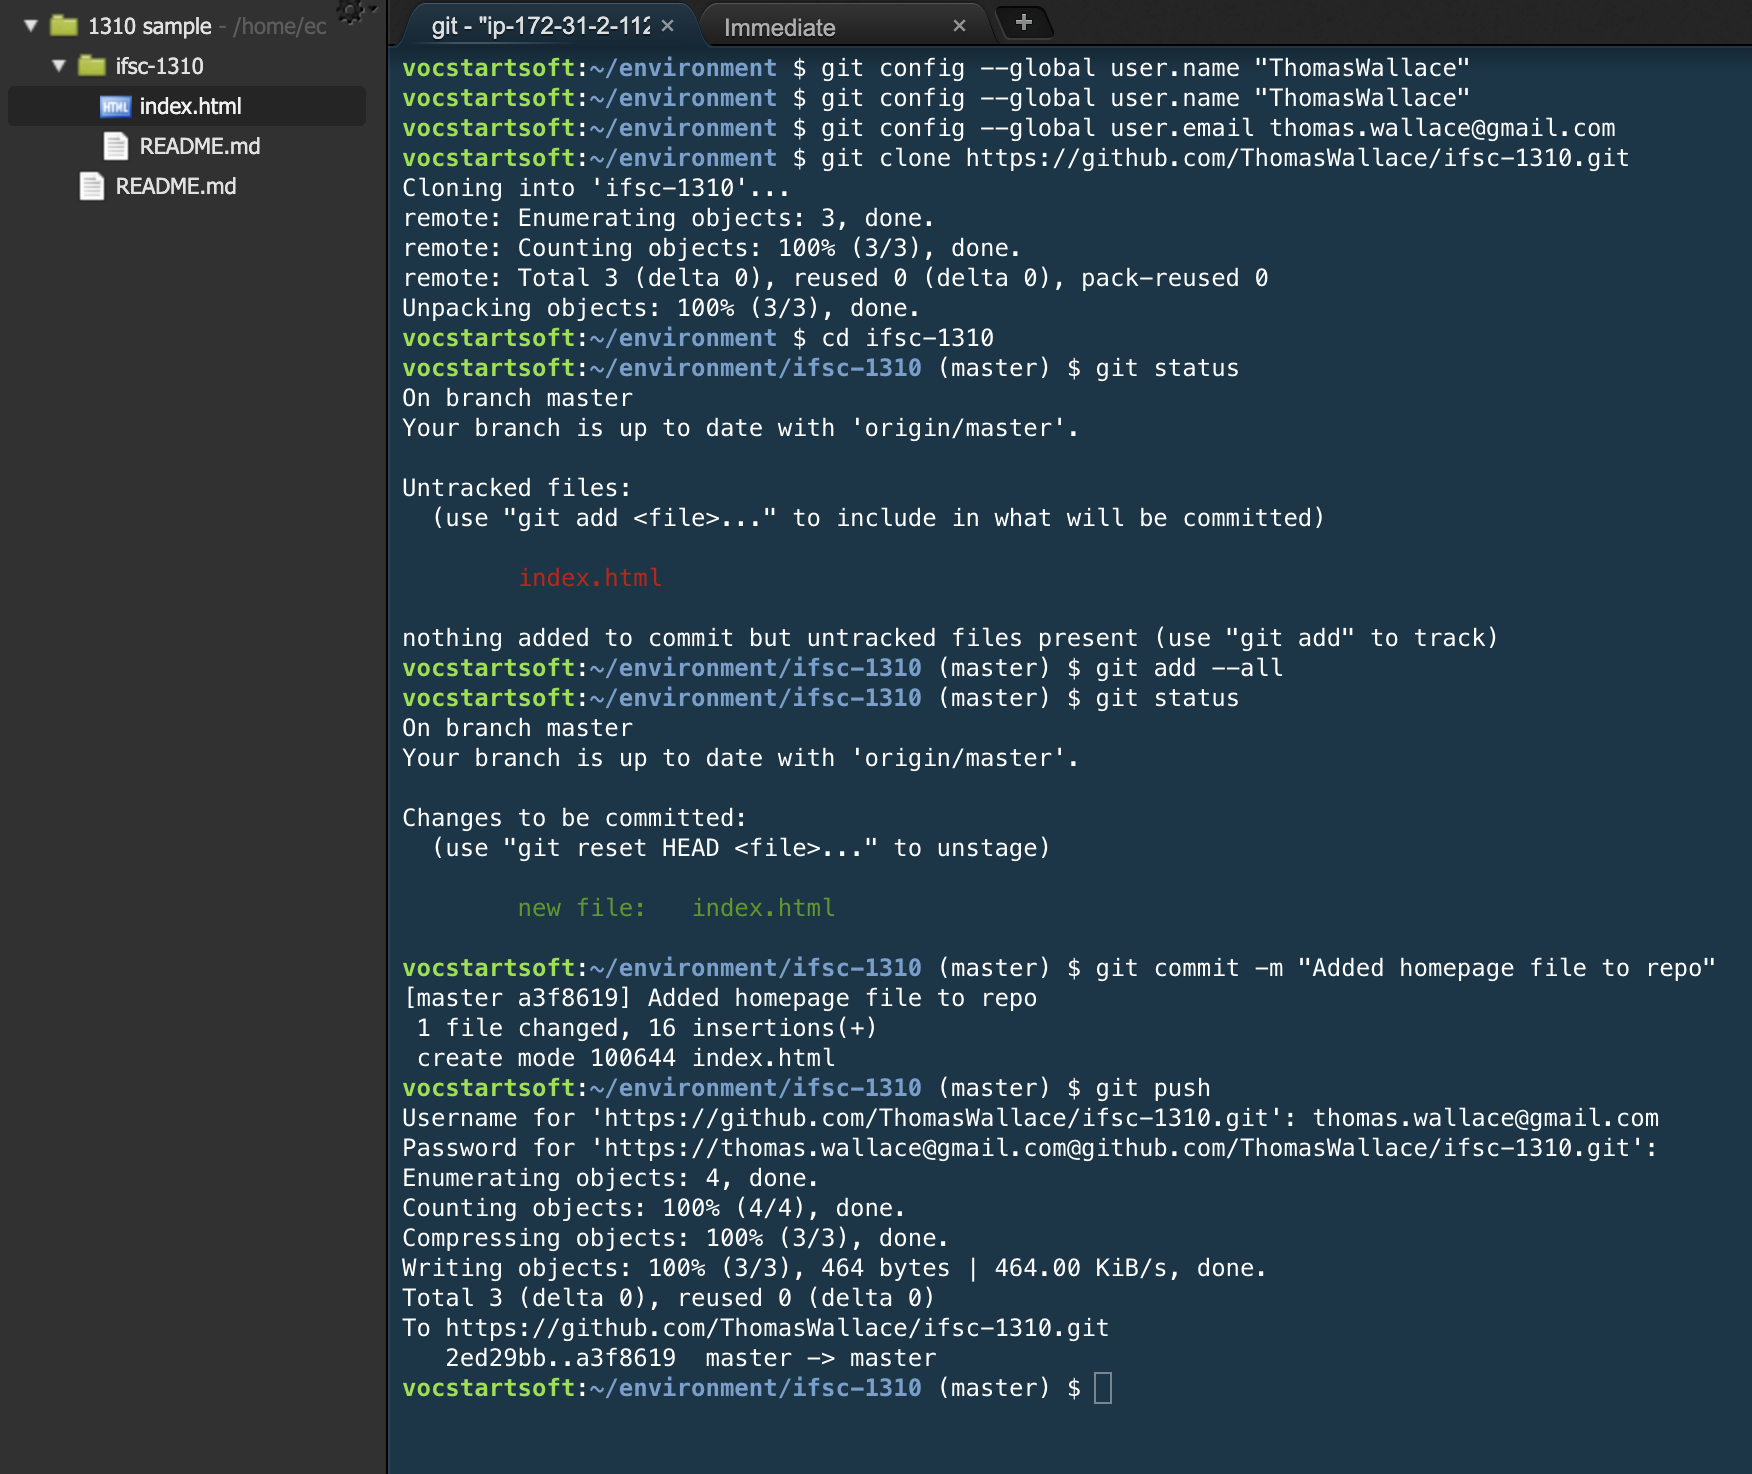
It will respond with a list of files that have been added since the last commit. (See Screenshot below)
- Next add the new files using:
git add --all
This command stages the files for publishing.
- Confirm the files were added using:
git status
(See Screenshot below)
- To commit changes type
git commit -m "Description of Changes in this commit"
This will commit changes and add a description to the commit version. When you submit assignments please include that this is an assignment submission. For example, When. you submit your first HTML Assignment make sure to indicate that in the notes “Prototype HTML Assignment Submission”
- Now to push the changes to Github run:
git push
You will be prompted for your username and password. Enter your github username and press return. When prompted for you password you will need to generate a personal access token in Github.
Create Your Personal Access Token
Personal Access Tokens are security certificates stored on Github. Previously when you tried to publish something from AWS to Github, you provided your username and password. Now Github requires a username and certificate.
- In the upper right corner of the Github page, click the dropdown arrow of the user icon, and select “Settings”
- You would think that Personal Access Tokens would in the Account Security tab, but it is not. Select the “Developer Setttings” tab, then the “Personal Access Tokens” tab. If you are logged in to Github, this link should take you to the right spot. https://github.com/settings/tokens
- Click the “Generate New Token” button.
- In the Note field, enter “IFSC 1310 Token”.
- Select the “repo” check box.
- At the bottom, click “Generate Token”
- The token is shown one time and cannot be viewed again. Copy the token, paste it into Notepad, and save the token value for later use.
NOTE: For security purposes, it does not show your password as you type it. It can be confusing the first time you do this.
- Check your Github Pages URL and you should see the file you just uploaded. (https://thomaswallace.github.io/ifsc-1310/)
Here is a screenshot of the terminal for reference:
